TV Guide, Scheduler & Recordings
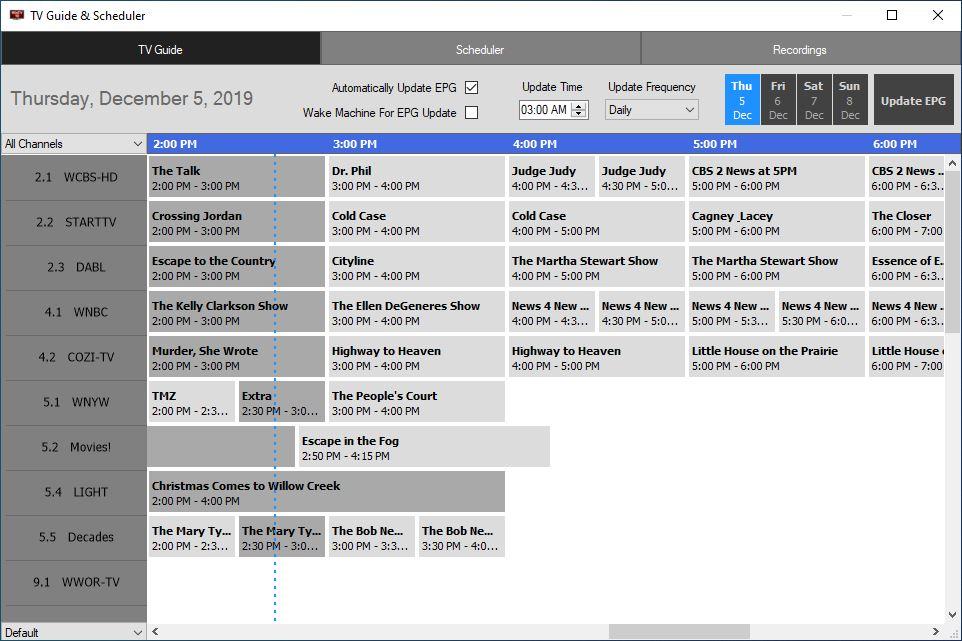
WinTV TV Guide
WinTV 10 introduces a TV Guide available only for over-the-air ATSC signals.
The TV Guide can be open from the Context Menu
Updating EPG
As you watch TV and change to different channels, the software will grab the TV guide data from the over-the-air signal and update those channels.
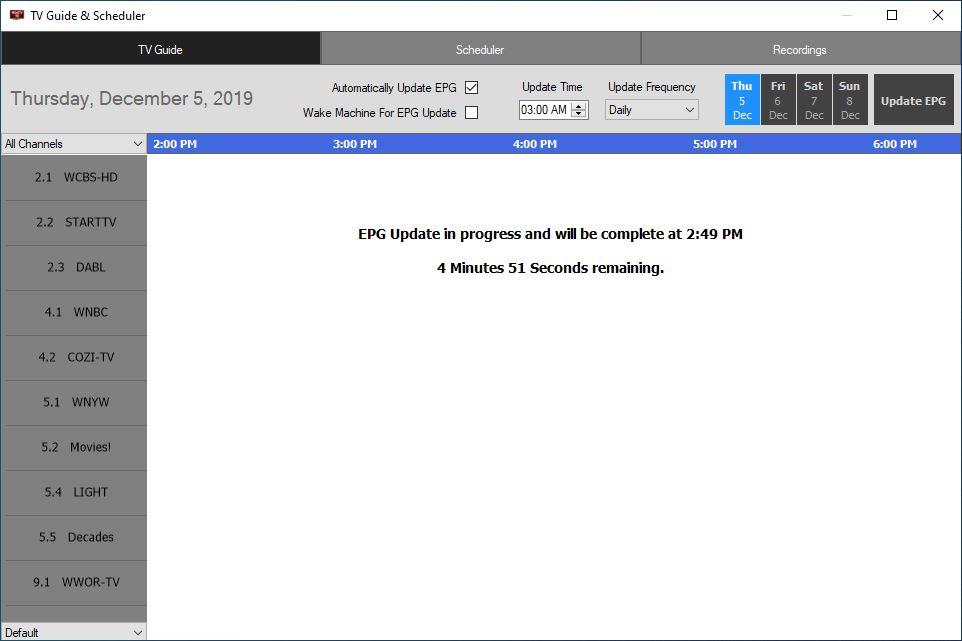
But you can also click on Update EPG to update all channels.
You will get an estimated amount of time until the EPG finishes updating. You can close the TV Guide window during this time. The update will continue in the background.
TV Guide Options
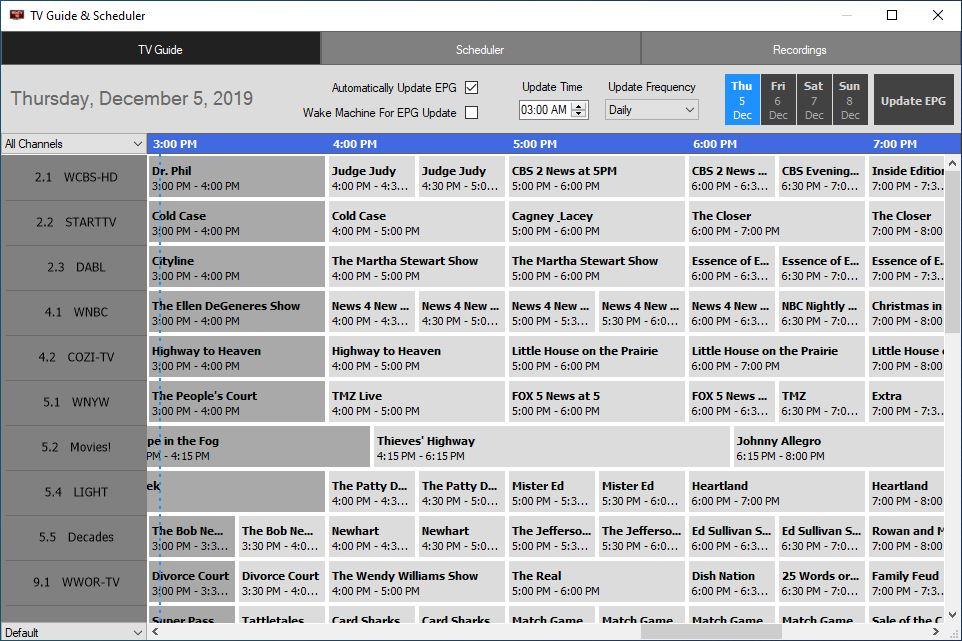
Once it has finish updating the EPG you should have a much filled EPG
The TV Guide window has the following additional options.
Automatically Update EPG: Check this box to have the EPG update at the time specified under Update Time
Wake Machine For EPG Update: The computer will wake up at the time specified if in sleep/standby.
Update Frequency: The options are Daily, 12 hour or 6 hours. This can be useful if some channels only provide limited amount of hours of data.
Season Recording
A new feature in WinTV10 is the ability to season record TV show using the TV Guide.
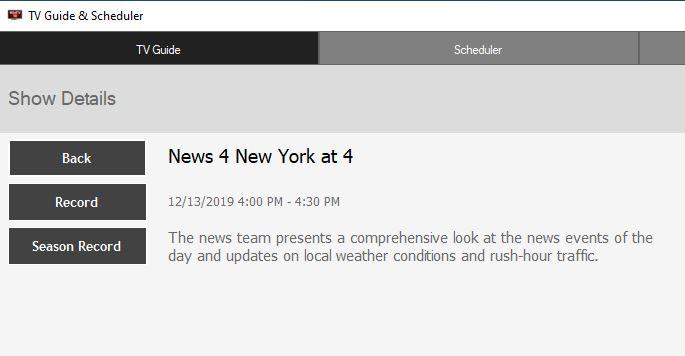
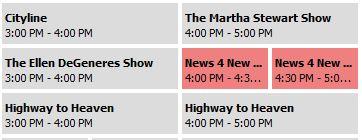
Clicking on a TV show on the guide will bring up information about the program. It will also allow you to click Back to return to the TV guide. You can click Record to scheduled a regular recording. You can also click on Season Record to scheduled all recordings for the program in the future. This is usefull if you like to record your favorite TV show and if time changes it will self adjust.
Once a show is scheduled to be recorded, it will show a red higlight around it.
WinTV Scheduler
Select Scheduler from the Options Menu, to open the scheduler window.
The Scheduler allows you to record a TV program at a certain date and time on a specified channel. It will list all scheduled recordings that have been set.
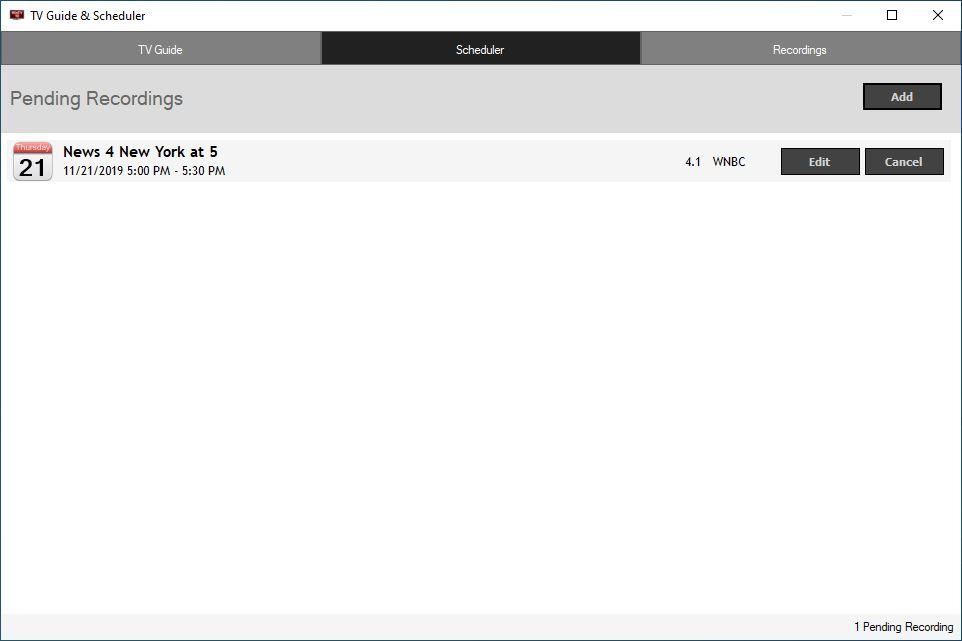
From here you can manually Add, Edit a previous scheduled recording or Cancel a recording.
To schedule a recording, click on the Add button. You will need to set the following information:
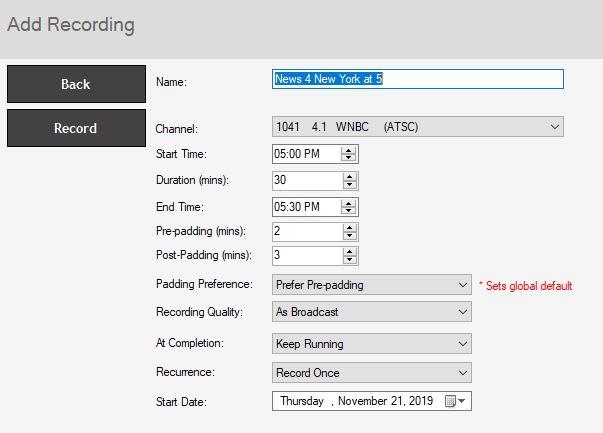
Name: The file name of your recording task. If you keep the name Default, the recording will use the name of the TV channel.
Channel: Choose the channel to record.
Start Time: Set to the desired start time.
Duration (Minutes): Set the length of the recording, using the arrows (steps of 5 minutes) or directly with the keyboard.
End Time: Alternative to the duration you can set the end time here. It will automatically adjust the duration
Pre-padding (mins): Specify how many extra minutes a recordings should start using pre-padding.
Post-padding (mins): Specify how many extra minutes a recordings should continue recording using post-padding.
Padding Preference: This option tells the application how to handle padding when two recodings are close together.
Prefer Pre-padding: Pre-padding will take preference with back to back recordings and one tuner.
Prefer Post-padding: Post-padding will take preference with back to back recordings and one tuner.
Split available padding equality: Padding with split between recordings.
Force Pre-padding - miss end of previous recording: Preference to pre-padding, first recording will miss end of recording to allow next recording to have pre-padding.
Force Post-padding - miss start of next recording: Preference to post-padding, second recording will miss begging of recording to allow first recording to have post-padding.
Recording Quality: Specify the recording quality (analog TV only). On digital TV recordings the recording quality is always as broadcast.
At Completion: Select the action that should be performed with the computer after the recording has finished. Choices are "Keep Running", "Shutdown", "Standby" and "Hibernate".
Recurrence: Record Once, Record Daily or Record Weekly: You can choose to have the recording repeat Once, Daily or Weekly.
The options will change depending on which recurrence you select
 \
\

Start Date: Select the start date for the recording.
End Date: By default Record Until Further Notice will be checked and option will be grayed out. Uncheck this to specify a specific end date.
Days to Record: If you select the Weekly option, select the week day you wish to have the show recorded on.
Once all the information is set, click Record to confirm. Click Update if editing a previously scheduled recording. You can add more events by clicking Add after each event is set.
When you are finished, click X on top right corner to exit the scheduler.
Performing the Recording
The WinTV application does not have to be running for a Scheduled Recording to work, but your PC will need to be either turned ON or in Standby Mode. All scheduled recordings are performed in the background by a task called “WinTVRec.exe”.
When a recording takes place, this is indicated by a red TV icon in the system tray.

Right click on this icon to see the following options:
"Watch <file name>" - Opens the WinTV application to play the current recording.
"Cancel Recording" - Terminates the recording.
Note: If you start the WinTV application while a recording is taking place on a single tuner product, it will play the current recording. Live TV will not be available.
WinTV Recordings
Select Recordings from the Options Menu, to open the recordings window.
The Recordings menu allows you see what has been recorded.
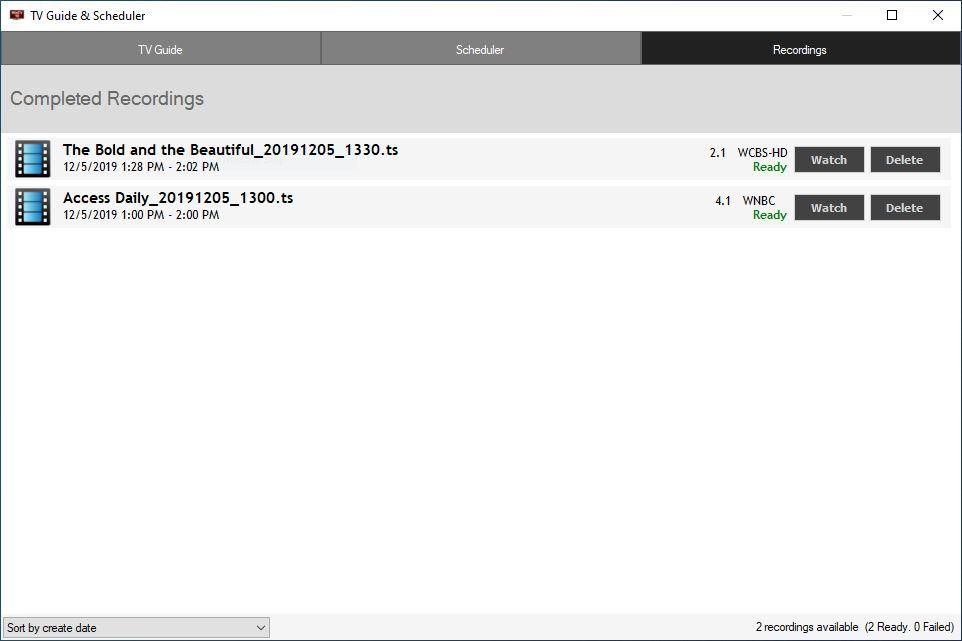
Watch will let you watch a recording through WinTV 10.
Delete will delete the recordings from WinTV and the computer.
Note: If you delete a recording from within WinTV Recordings, it will be moved to the Recycle Bin.
Sort By will let you sort recordings by date or name.
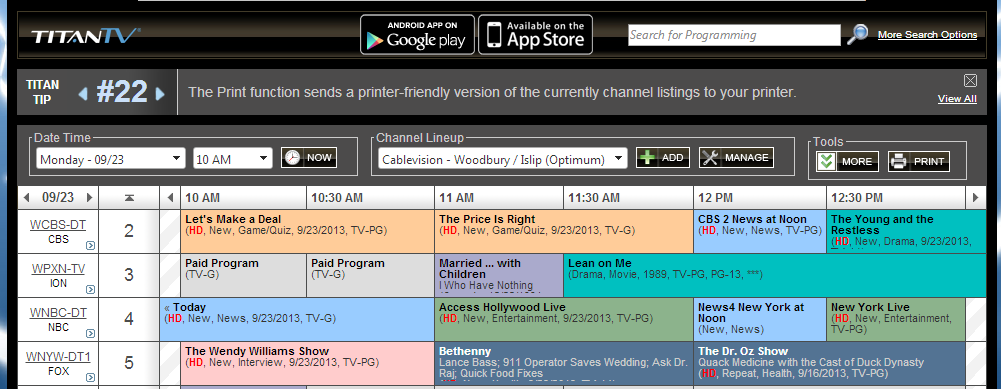
TitanTV
TitanTV is a free online TV Guide available for U.S. TV providers only.
TitanTV can make it easier to add scheduling recordings to WinTV Scheduler.
TitanTV Website
When WinTV 10 is installed the following shortcut icon is placed on the desktop.

You can double click it to go to the TitanTV website or manually type on your browser http://www.titantv.com
Under Channel Lineup you can select your provider or click Add to add your provider lineup.
No account is required with TitanTV, but you can make a free one so it remembers your preferences
Scheduled a Recording
To schedule a recordings with TitanTV, click on a TV show upcoming and on the window that opens click on Record.
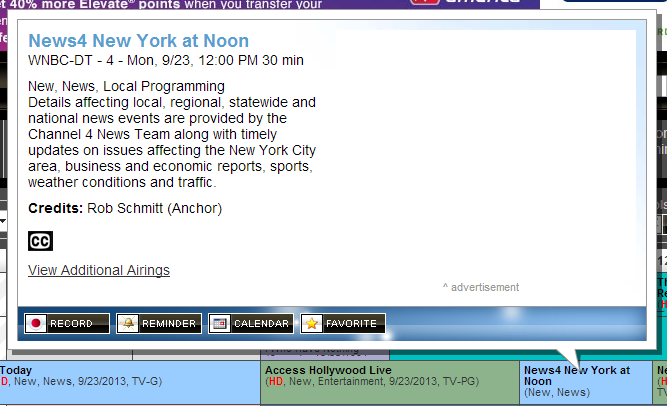
The TV show selected will be added to the WinTV Scheduler.

Note: In order to schedule a recording the channel number in the TitanTV must correspond to a channel in the WinTV 10 channel list. For example if you want to record WNBC and the channel number in TitanTV is 702 then you must edit the channels number in WinTV. All QAM channels are in the 2xxx range. All ATSC channels are in the 1xxx range.
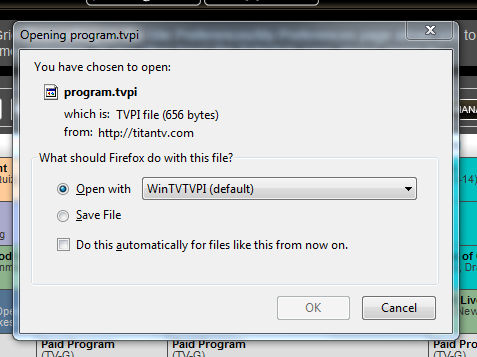
Browser Differences
When record is clicked a file ‘program.tvpi’ needs to be opened by our WinTV 10 software to schedule the recording. This file holds the information about the program that will be scheduled. But different browsers handle the file differently, some ask you to open or save it. In general you want to select open.
Internet Explorer: Internet Explorer will ask you on the bottom, please click Open.

Mozilla Firefox: Firefox will ask you in a window, please make sure Open with is selected and click OK.
Google Chrome: Goggle Chrome automatically saves the file. Please click the file on the bottom left corner to open.
